zabbix监控mysql
方案1: 使用官方 推荐的方案 https://git.zabbix.com/projects/ZBX/repos/zabbix/browse/templates/db/mysql
方案2: 自己写脚本
问题: 官方在 Zabbix 4.2.1 上测试通过,而我安装的zabbix 4.2.6 版本的. 在配置mysql用户信息时出问题了.
我直接创建一个zabbix 本地登录不要密码的用户解决的.
步奏:
1. 下载zabbix-agent上的数据库模板配置文件
wget https://git.zabbix.com/projects/ZBX/repos/zabbix/raw/templates/db/mysql/template_db_mysql.conf?at=refs%2Fheads%2Fmaster -O /etc/zabbix/zabbix_agentd.d/template_db_mysql.conf
2. 在zabbix-agent机器上创建监控用户
CREATE USER 'zbx_monitor'@'%' IDENTIFIED BY '密码'; GRANT USAGE,REPLICATION CLIENT,PROCESS,SHOW DATABASES,SHOW VIEW ON *.* TO 'zbx_monitor'@'%';
2.1 创建授权监控数据库的用户[可选的,]
create user 'zabbix'@'localhost';GRANT USAGE,REPLICATION CLIENT,PROCESS,SHOW DATABASES,SHOW VIEW ON *.* TO 'zabbix'@'localhost';flush privileges;
2.1.1 在mysql8中解决问题的两种方法
在mysql8上没法创建一个没有密码的账户,现在曲线解决这个问题. 直接在命令上加上密码和账户的参数,虽然不安全但是临时解决这个问题了.
注意在命令行执行的时候会提示mysql: [Warning] Using a password on the command line interface can be insecure.这个影响xml解析了,所以要把它过滤掉. 使用2>/dev/null 把错误重定向到/dev/null上即可
UserParameter=mysql.ping[*], mysqladmin -u zbx_monitor -pAbcabc123 -h"$1" -P"$2" ping 2>/dev/null UserParameter=mysql.get_status_variables[*], mysql -u zbx_monitor -pAbcabc123 -h"$1" -P"$2" -sNX -e "show global status" 2>/dev/null UserParameter=mysql.version[*], mysqladmin -u zbx_monitor -pAbcabc123 -s -h"$1" -P"$2" version 2>/dev/null UserParameter=mysql.db.discovery[*], mysql -u zbx_monitor -pAbcabc123 -h"$1" -P"$2" -sN -e "show databases" 2>/dev/null UserParameter=mysql.dbsize[*], mysql -u zbx_monitor -pAbcabc123 -h"$1" -P"$2" -sN -e "SELECT SUM(DATA_LENGTH + INDEX_LENGTH) FROM INFORMATION_SCHEMA.TABLES WHERE TABLE_SCHEMA='$3'" 2>/dev/null UserParameter=mysql.replication.discovery[*], mysql -u zbx_monitor -pAbcabc123 -h"$1" -P"$2" -sNX -e "show slave status" 2>/dev/null UserParameter=mysql.slave_status[*], mysql -u zbx_monitor -pAbcabc123 -h"$1" -P"$2" -sNX -e "show slave status" 2>/dev/null
到后来查看mysql命令发下如下
Default options are read from the following files in the given order:/etc/my.cnf /etc/mysql/my.cnf /usr/etc/my.cnf ~/.my.cnf The following groups are read: mysql client
上面这么多路径都是支持的. 只不过修改就是全局的了.所有用户只要不指定用户和密码都使用这个用户名和密码登录了.
[client] user=zbx_monitor password=Abcabc123 # For advice on how to change settings please see # http://dev.mysql.com/doc/refman/5.7/en/server-configuration-defaults.html [mysqld] #
2.2 下面的这一步不生效,zabbix用户的家目录/var/lib/zabbix 在下面创建.my.conf 就是不生效. Zzzz
- Create
.my.cnfin home directory of Zabbix agent for Linux (/var/lib/zabbixby default ) ormy.cnfin c: for Windows. The file must have three strings:
[client]user=zbx_monitorpassword=设置的密码
3 下载应用监控模板文件
https://git.zabbix.com/projects/ZBX/repos/zabbix/raw/templates/db/mysql/template_db_mysql.xml?at=refs%2Fheads%2Fmaster
在zabbix-server的web上导入即可.
操作路径是配置->模板->导入
选择上面下载的模板文件导入.
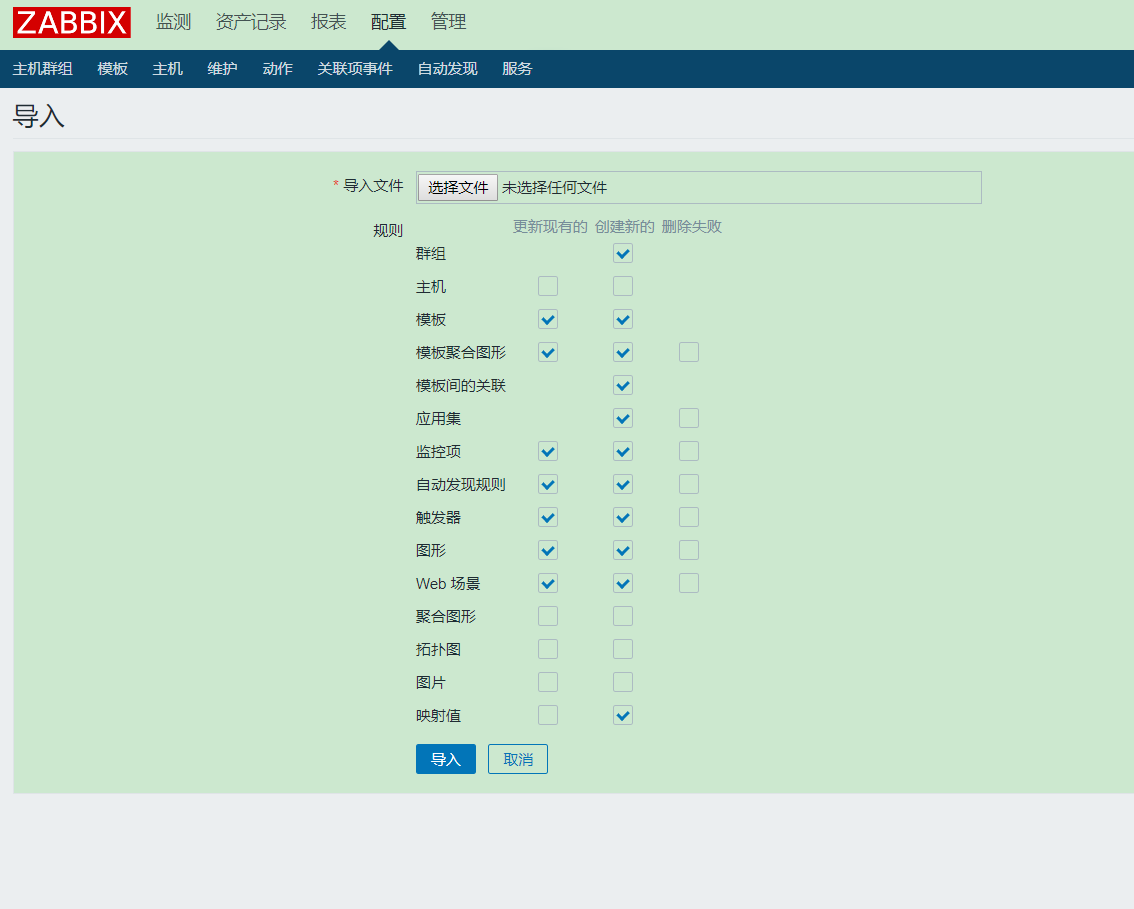
导入成功后

4 新建mysql主机
路径 配置->主机->新建
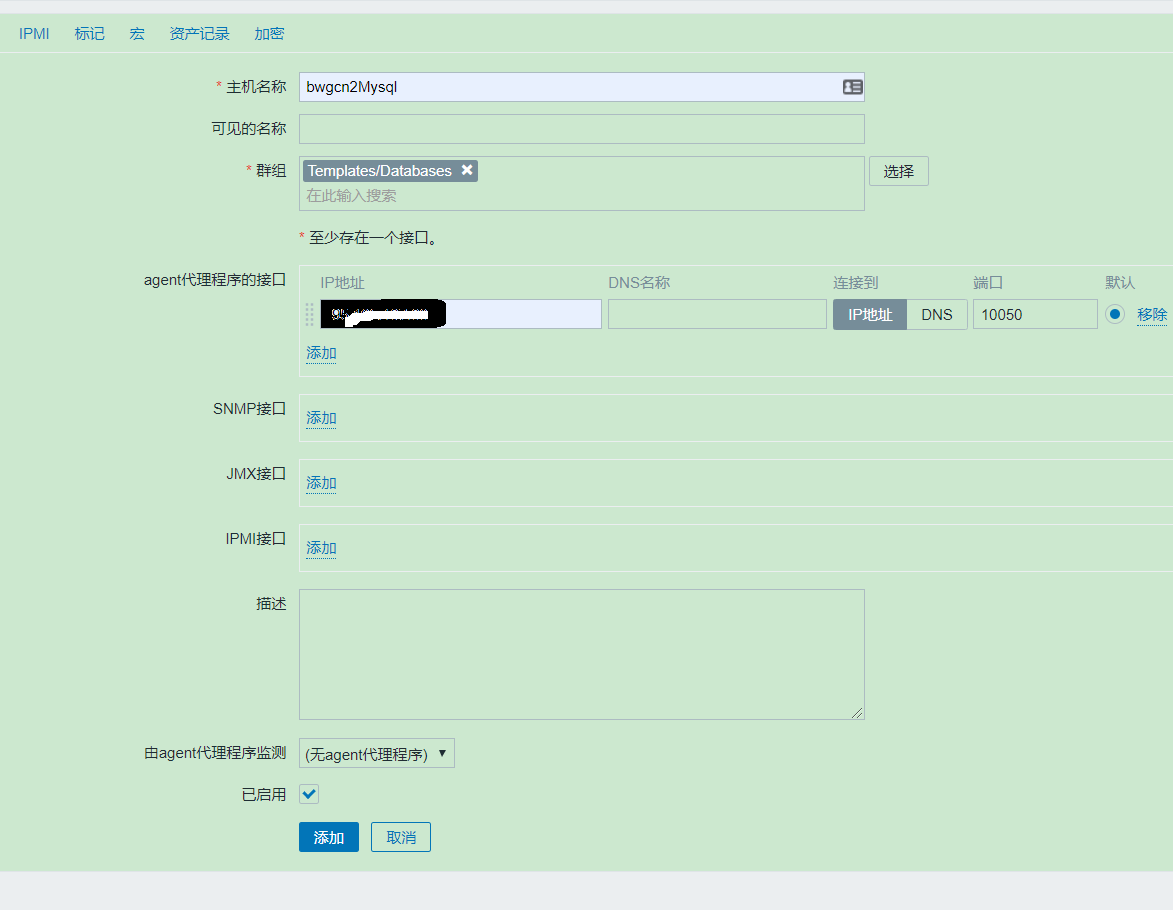
4.1 关联模板

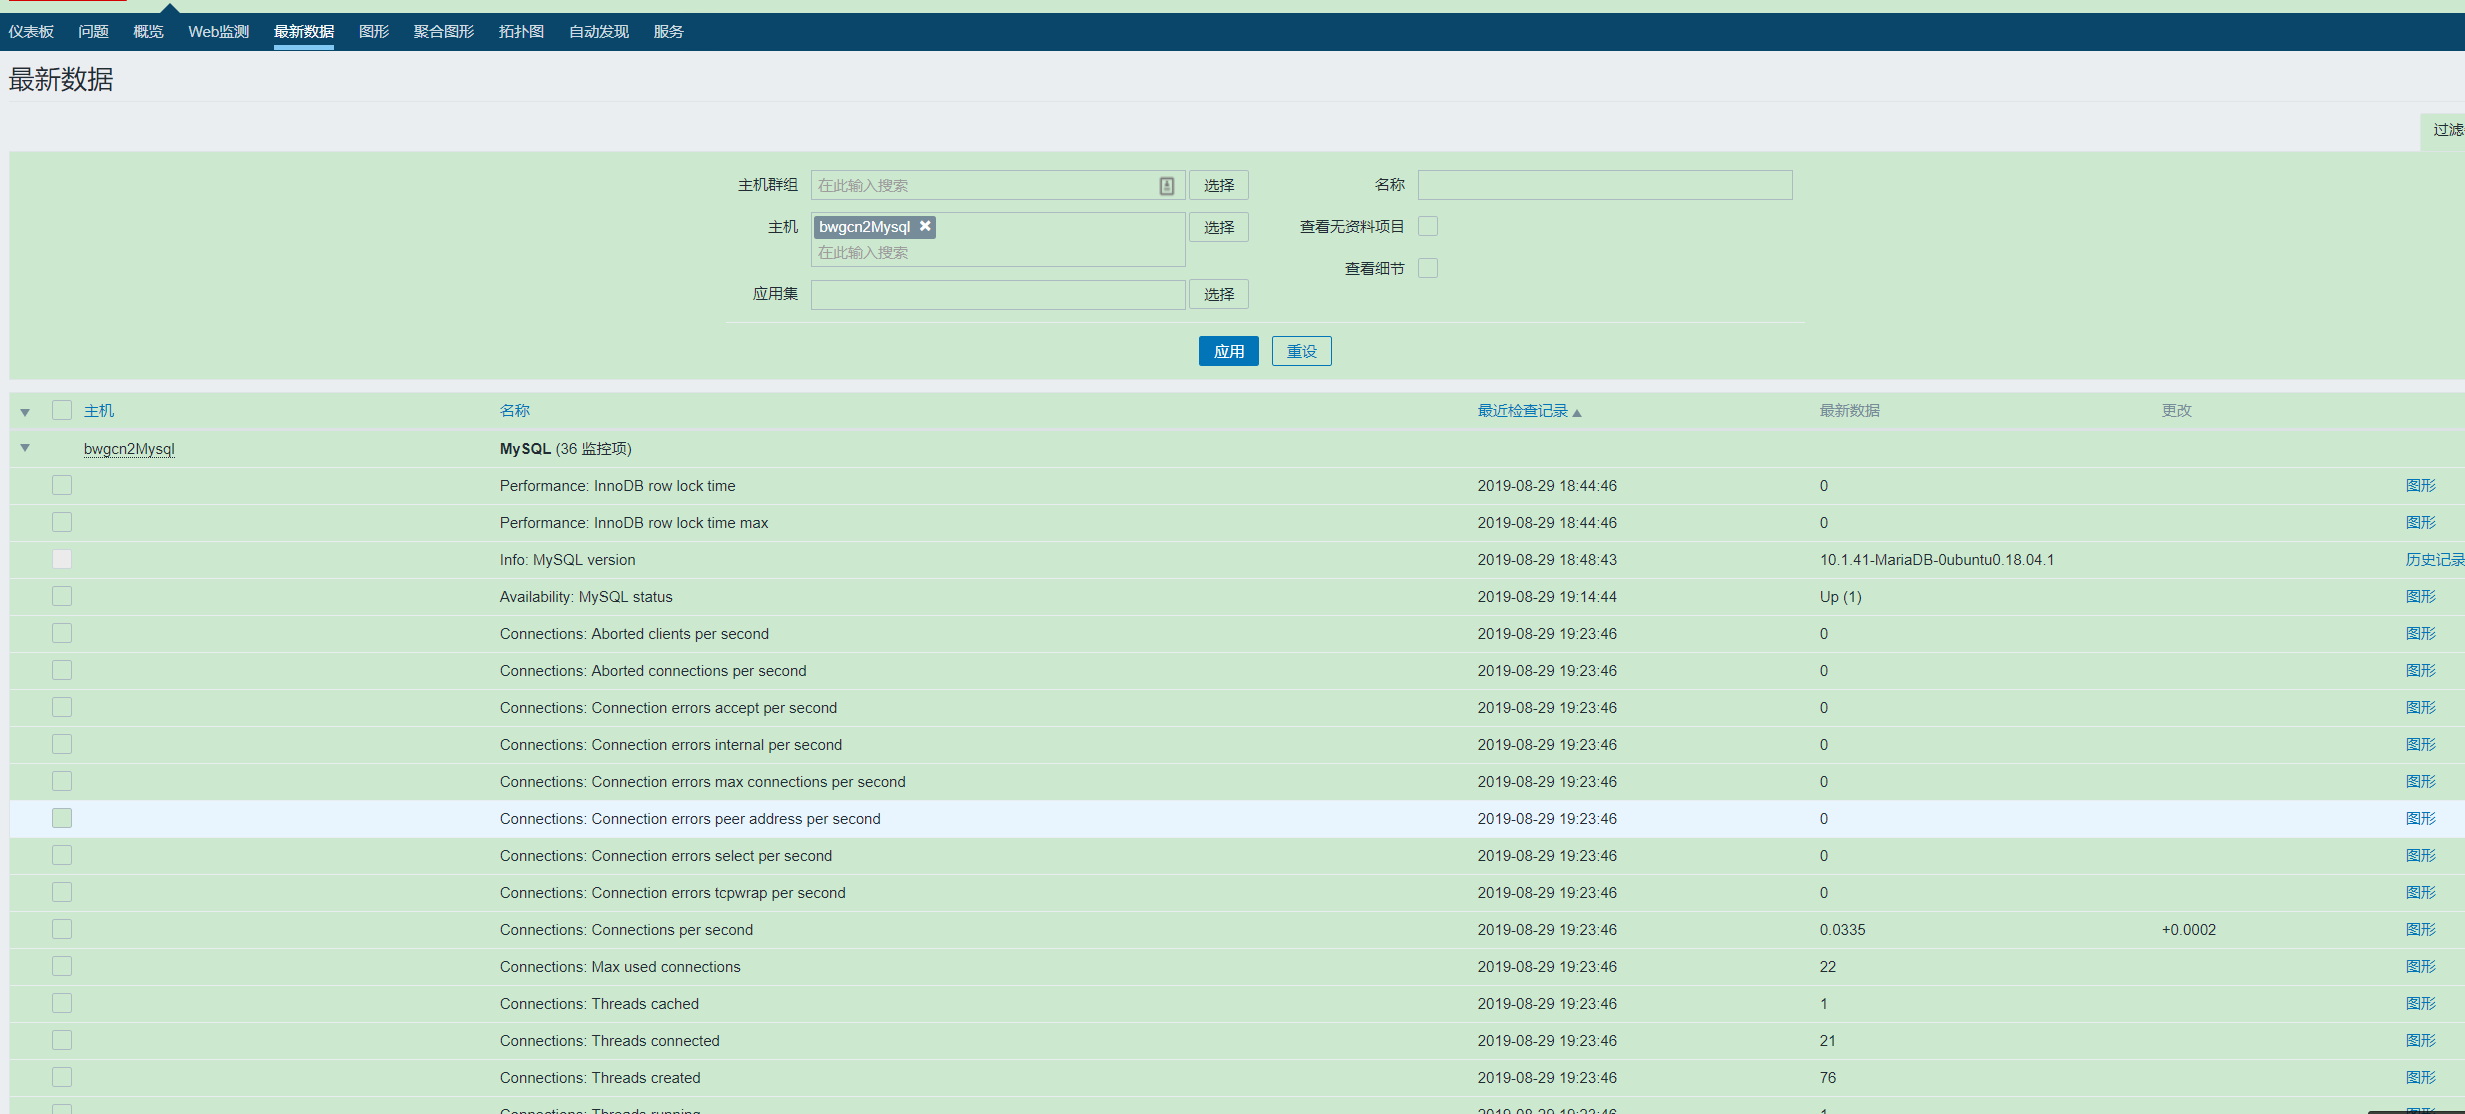
4.2 查看mysql主机的数据
方案2:请参考下面网页
http://www.sunrisenan.com/docs/zabbix/zabbix-1ari17qg766mj
https://blog.51cto.com/chaixinwang/2057488
https://www.zabbix.com/documentation/3.4/zh/manual/concepts/get